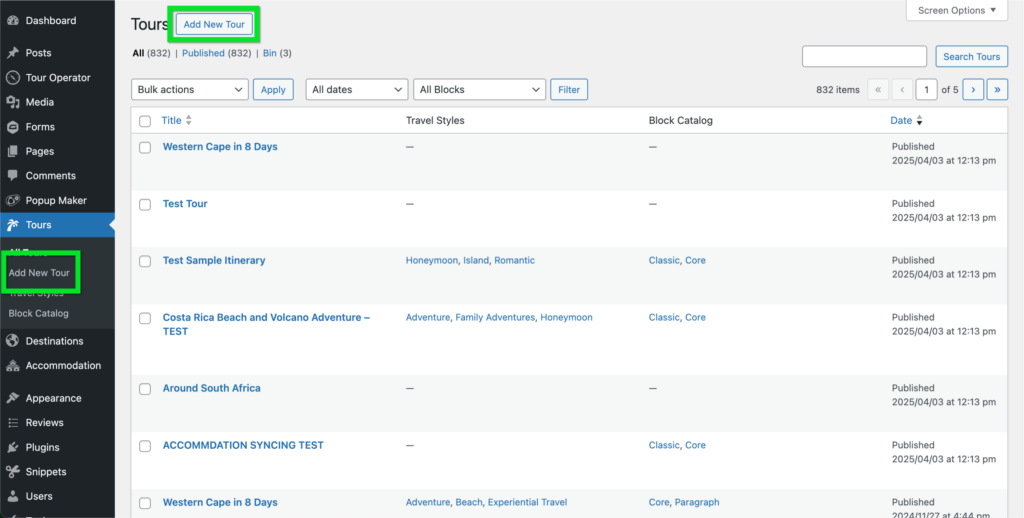
Creating the tour/itinerary #
- Navigate to your WordPress Dashboard
- Hover over Tours in the left column.
- Select the Add Tour.
OR - Click the Add New Tour button at the top.
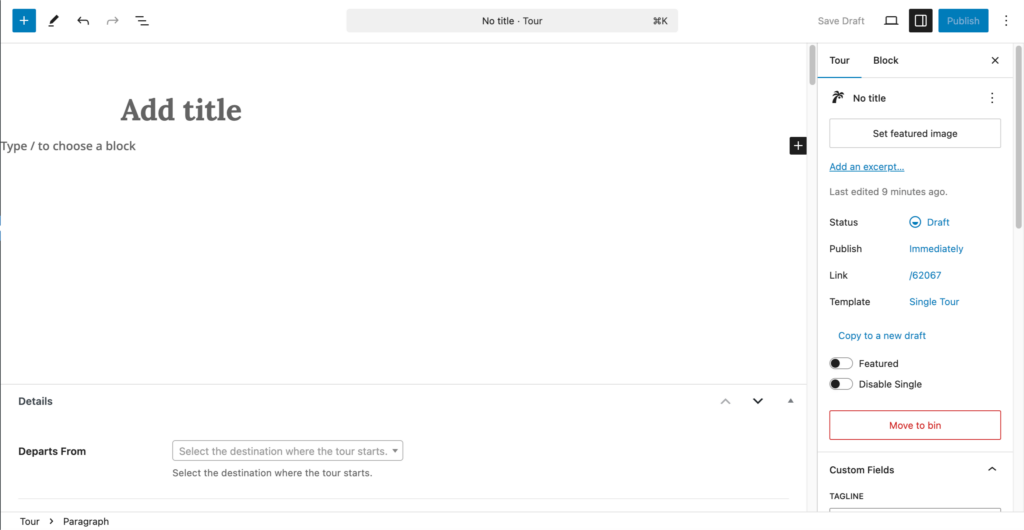
Editing the main content #
- Title – Edit the Title of a tour by editing the field labelled Add title
- Content – Add information about the tour in the main content field.
- Featured Image – Set the Featured Image by clicking Set Featured Image in the top right.
- Excerpt – You can set an Excerpt for the tour by clicking the Add an excerpt… link. This will appear in the tour’s card on landing pages.
- Featured – If this is toggled, the tour will be Featured, and appear in Featured Tours sections of the site.
- Disable Single – If this is toggled, the single page will be disabled, this means that although the tour will appear on landing pages and searches, it will redirect to the home page when clicking on it.
Below is an empty tour, as well as a completed tour for your reference:

Configuring the tour #
Details and Custom Fields sections #

NOTE: If any field is left blank, it will not display on the front end of your tour.
In the Details section you can configure various details of your tour. These include:
- Departs From – Select the destination your tour departs from.
- Ends In – Select the destination your tour ends in.
- Group Size – Set the number of people you will cater for on your tour.
- Highlights – State some highlights of your tour.
- Included – Advise guests on what is included in the price of your tour.
- Not included – Advise clients what is not included in the price of your tour.
- Booking Validity (Start) – If your tour has a limited booking validity, enter the start date here.
- Booking Validity (End) – If your tour has a limited booking validity, enter the end date here.
- Expire this tour automatically – If this box is checked, the tour will automatically be expired after the date in the Booking Validity (End) field is reached.
In the Custom Fields section in the right hand column you can configure important information for your tour that will display in their respective blocks on the front end. These include:
- Tagline – Set a tagline for your tour.
- Price – Set the price of your tour.
- Sale Price – Set the sale price of your tour.
- Duration – Set the duration of your tour.
- Single Supplement – Set the price for an individual taking your tour.
- Best Time To Visit – What months of the year it is ideal to take your tour.
In the Travel Styles section in the right hand column you can assign travel styes to the tour/itinerary. Read the documentation on Editing Travel Styles here for more information on how to set them up.
Location and Media sections #

NOTE: If any field is left blank, it will not display on the front end of your tour.
In the Location section you can configure how the map displays for your tour.
- Map Placeholder – Upload an image to display in the Map section in the front end if no GPS data is available.
- Itinerary KML File – Upload a .kml file with your itinerary information, this will display on the map in the front end.
In the Media section you can add images and videos for your tour.
- Gallery – To add images to your tour that will display in the gallery section, click Add new image and either select or upload images.
- Videos – Add videos of your tour by filling in the relevant fields:
- Title – The title of the video
- Url – The url where the video is hosted
- Caption – The caption displayed with the video on the frontend.
- Alt Text – Alternative text for accessibility, describing the video for screen readers.
Itinerary section #

NOTE: If any field is left blank, it will not display on the front end of your tour.
In the Itinerary section you can configure what information will display on each day, or stop, of your tour.
- Title – The title of this span of your tour.
- Tagline – The tagline of this span of your tour.
- Description – A description for this span of your tour.
- Featured Image – Upload or select the featured image for this span of your tour by clicking the Add or Upload File button.
- Related Accommodation – Select the accommodation where this span of your tour will be hosted.
- Related Destination – Choose the destination (region or country) associated with this Ispan of your tour.
- Included – Items or services provided during this span of your tour.
- Excluded – Items or services provided during this span of your tour.
- Drinks Basis – Select the drinks allowances and inclusions during this span of your tour.
- Room Basis – Select the room allowances and inclusions during this span of your tour.
You can delete this itinerary entry by clicking the Remove button at the bottom of the entry, or by clicking the red X at the top left of the entry, next to the Title.

Related section #

NOTE: If any field is left blank, it will not display on the front end of your tour.
In the Related section you can connect accommodation, destinations, activities, specials and team members to your tour. These will display in their respective blocks on the front end.
- Related Posts – Select blog posts on your website that are related to your tour.
- Related Accommodation – Select accommodation that is connected to your tour.
- Related Destinations – Select the destinations that your tour travels through.
- Activities – Select activities connected with your tour.
- Specials – Select specials connected with your tour.
- Teams – Assign team members to your tour.


